A flight of owls

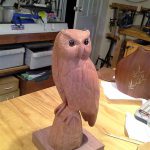
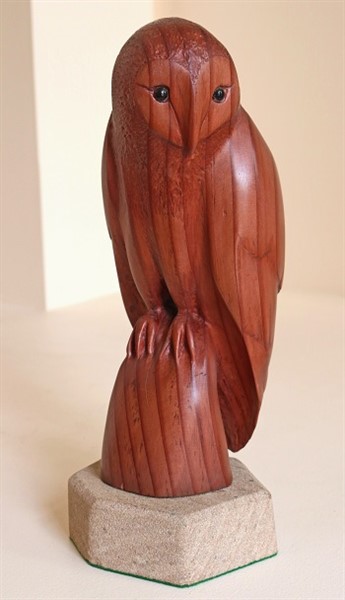
  Last year, our 11 year old granddaughter came across a picture of this barn owl that I had carved for our last exhibition and was very sad that it had been sold. 

This seemed a useful lead for a possible Christmas present, so I quietly tried to find out what sort of owls she liked. As it turned out, she was something of an owl aficionado, mostly from her extensive knowledge of the fine details of the Harry Potter novels in which owls apparently play a major role in delivering letters and performing other essential services in the aid of magic.

One thing of which she was quite sure that was that her favourite member of the squadron was the Great Horned Owl. This presented another challenge – my first owl had been semi abstract – mostly because I wanted it that way, – my main aim was to try to capture the quizzical over the shoulder look…..
Barn owl 1
Barn owl 2
Barn owl 3
Barn owl 4
Barn owl 5


I would have to admit however that the semi-abstract format also gave me the ideal excuse for avoiding the tricky problem of carving feathers. So the next task was to find out what a Great Horned Owl really looked like and how to carve the fine details. Fortunately there are a couple of really useful reference sources: The Illustrated Owl by Denny Rogers  and Owls by the doyen of bird of prey carvers Floyd Scholtz . His  instructional video showing how to use rotary power tools is also well worth the $4 cost.

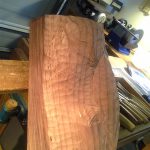
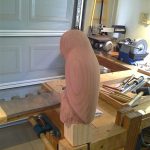
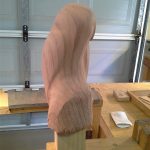
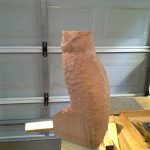
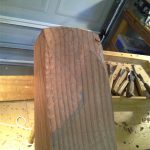
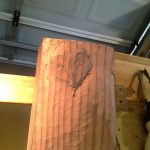
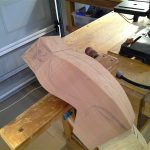
So, armed with all this advice I set about a fine piece of Chilean myrtle as shown below. I marked out all the key shapes and landmarks very carefully and cut out the basic blocks with a band saw. One useful piece of advice when carving heads, whether of humans or other animals, is not to cut down to the the back of the piece until you’re absolutely sure that the front view is OK – it’s hard if not impossible to correct any frontal errors by re-cutting if you’ve already defined the limits of the back and taken away any spare wood. 
Great horned owl 1
Great horned owl 2
Great horned owl 3


The feathers proved a challenge despite all the advice and video instruction. I managed some of it with rotary tools but mostly I used small v-chisels and lino cut gouges, ruby burrs and thin cones of sandpaper. 
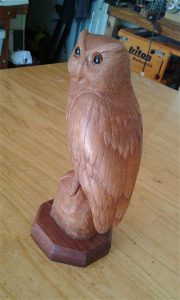
Great horned owl final


The final version seemed of fit the bill and now stands guard in her bedroom in Wyoming 
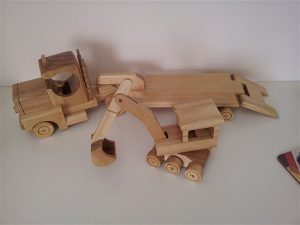


Low loader and earth mover

A enterprise of this sort was unlikely to go unnoticed by her 6yr old bother of course, so I turned again to that essential reference for all grandparent woodworkers with small grandsons who prefer trucks and military hardware to wildlife: Norm Marshall’s Great Book of Wooden Toys. The detailed plans he provides are very easy to follow or modify to taste as I had done for an earlier present in the shape of a low loader and earth mover.
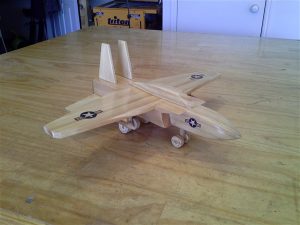
On this occasion a well armed jet fighter was clearly needed to deter any dastardly owlish tricks. 



Off to war

… and it even fitted on the low-loader. 
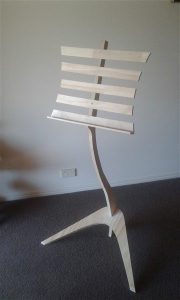
 

A steep learning curve

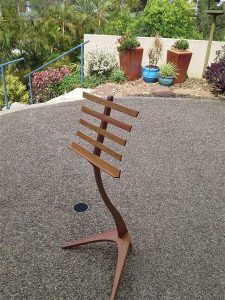
The run up to Christmas 2016 was a busy time –  several requests for platters and twig vases to be given as gifts, but a couple of left-of-field requests that put me on a steep learning curve. The first was from the wife of an old friend who is a fine clarinetist, and who had mused that he would like to have a wooden music stand to replace his old and battered metal one for practice at home. She had searched high and low to find one as a surprise Christmas present but without much success, and so asked if I could make one. Quite a challenge, – to make something that was functional but that also looked good, especially as most of my previous experience had been in free-form carving, not fine woodworking with precision joinery. 

Pine prototype

It soon became clear that to make it fully adjustable would stretch my skills to breaking point, so we covertly measured the height and angle at which the metal stand was invariably set so that I could design a fixed stand tailored to his usual playing position.

It seemed prudent to first build a prototype in pine as a practice run, and this all seemed to go reasonably well. 


Flush with success, I set about making the final version in  New Guinea Rosewood. This all went very well until the final clean- up stage, when I cheerfully but disastrously planed off too much wood from the foot piece. The pride that I had taken in making the difficult joint with the main shaft with such precision was soon dissolved into angst, at the site of a new small but calamitous gap between the pieces that made the stand wobble drunkenly from side to side, unable to hold itself up, let alone a sheet of music.  I obviously needed some help, and so sought advice from an excellent local fine woodworker and teacher Robert Howard   I signed up for a few lessons, which I obviously should have done before I started cutting the wood.

Final version

He took one look at my wobbly joint and said that although it might be possible to repair the damage, that it would be much better to cut a new foot piece. I ruefully agreed that a quick kludge was not the way to go. Fortunately I had enough rosewood left to cut a new foot and upright and with his help made a much better joint the second time around.

I also learned a lot of other skills from Robert in a short space of time and would thoroughly recommend him as a teacher, for both carving and fine woodwork.

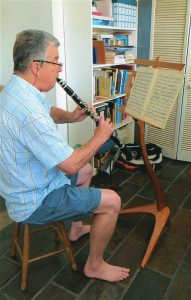
In action

The final version seemed to be very well received, and there is evidence that it does now keep the music roughly where it should be.

Rob Howard said that it wouldn’t be too difficult to make an adjustable Mark II version, but I  said that I needed some therapy with my usual rough woodwork for a while before I would feel adventurous enough to tackle the fine form again.  

Dueling Geckos

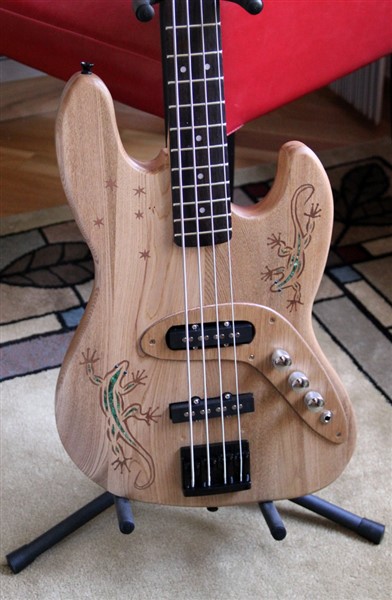
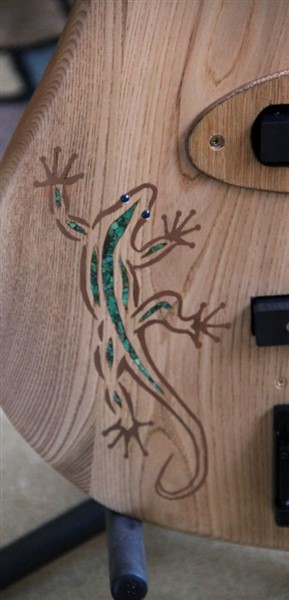
My brother-in-law Martin Plumeri and his wife Pat from California both decided to learn to play the electric guitar a few years ago, and this has since become a big part of their lives.  Martin branched out into guitar building, mostly by using and modifying some of the kits that are available. These are mostly finished with painted surfaces but some of the wood that is used – mostly ash quite often has an attractive grain. He suggested that I might like to do a natural finish – perhaps with some metal inlays of the sort that I’ve used on my carvings. He was also keen that there should be an Australian theme. The jazz  bass kit came from Pit Bull Guitars  – a company in West Australia that has a wide range of kits and other materials for guitar makers. The wood of the body is laminated so we needed one that had well aligned grain, and Adam Boyle, the founder and proprietor of the company was kind enough to sort out one that was very nicely matched for us. For decoration I carved two geckos that are constant uninvited house guests here in Queensland and used copper and crushed malachite for the inlays.  To place the geckos where they looked best we had to abandon the plastic finger guard and chrome electronic control panel. This exposed the wiring channels and other recesses so I used a thin plywood panel veneered with camphor laurel as cover, and as luck would have it, a boomerang shape emerged that worked well and added another Australian touch as did the Southern Cross.  The body ash and the headstock rosewood and maple were finished with a lot of sanding and several coats of Danish oil.


Martin took over the final assembly, wiring and tuning and tells me that it plays well. It was a great collaborative building experience

Finding the form – Huon Pine

Every block of stone has a statue inside it and it is the task of the sculptor to find it”  (Michelangelo)

– so too in a block of wood, but sometimes it’s pretty well hidden …


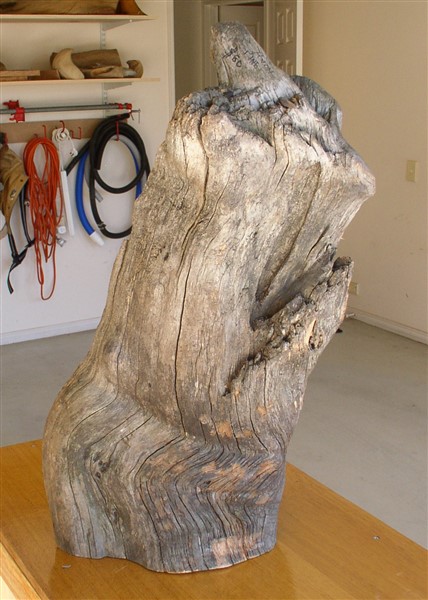
In this case for example, I would have to admit that beauty was probably in the eye of the beholder. It was part of the stump of a fire damaged Huon pine on sale in the ‘irregular bits’ box of  wood dealer Trevor Gaskell’s stand at the Maleny Wood Show. At first the only redeeming feature seemed to the zig-zag lines at the base that hinted at the possibility of  fiddleback – an attractive grain pattern that arises from stresses that distort the growing tree. I had also heard that Huon pine was very good to carve and was a favourite with boat builders because of its water and marine pest resistance, but as I had never worked with it before, it seemed a good opportunity to experiment.

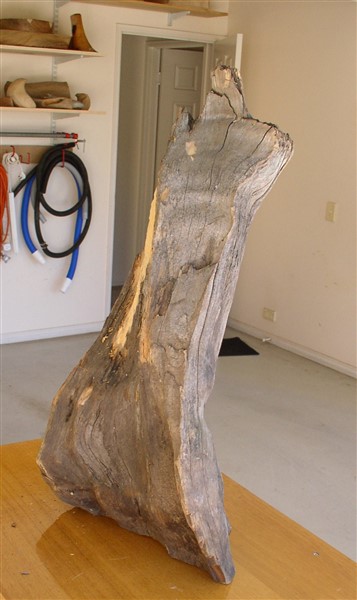
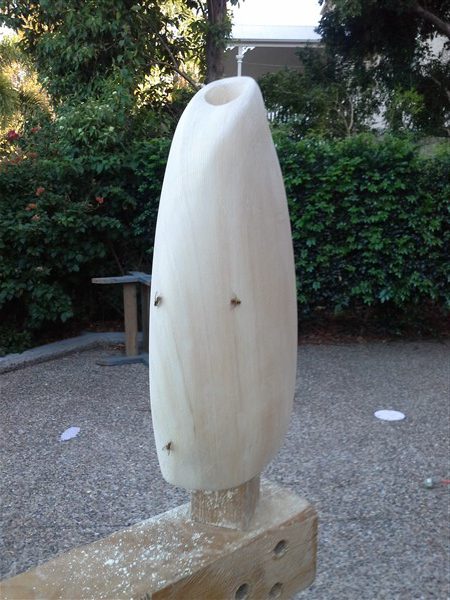
….and turning it round, the graceful backward sweep of the piece raised the possibility that a semi-abstract torso might be lurking in there somewhere,

Scraping off some of surface grime and weathering showed that most of the wood beneath was healthy enough,  although there were a few central fissures that might run deep and force a change of plan later on.

Still, this is all part of the fun of carving irregular but interesting wood – you never quite know what’s going to emerge – sometimes a pleasing set of surfaces and curves  – or sometimes just  a small unsightly lump and a large pile of wood chips !

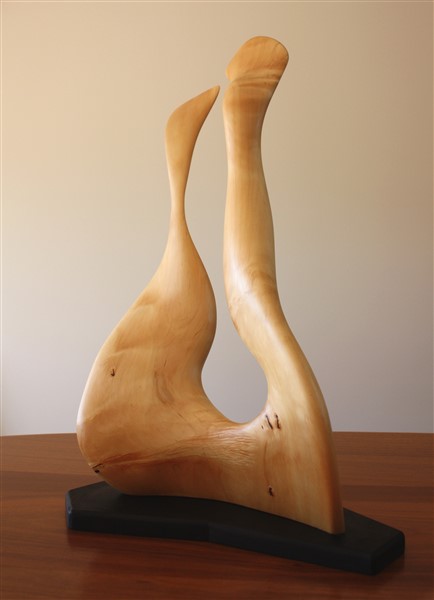
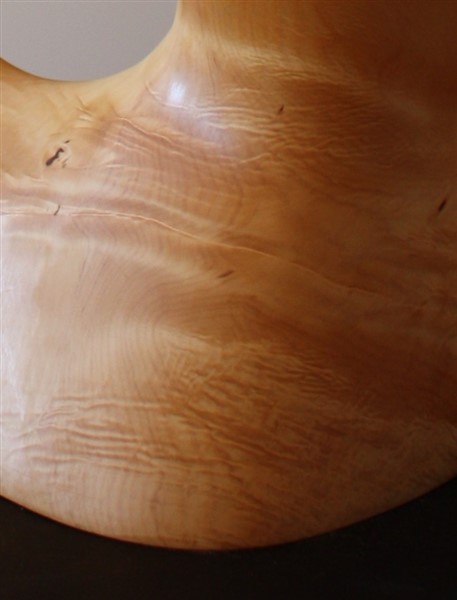
In the event, I thought that this would be the fate of this piece after I had removed all the rough and damaged wood. The central crevasse became progressively wider and wider, and deeper and deeper, until it ran right through from front to back, distorting my imagined torso into a shape that would have taken the talents of Henry Moore to make attractive.  I  therefore didn’t bother taking any more photos as I thought it would all end up as garden mulch. But then a new possibility arose, phoenix-like, from the chips,  as not one, but two torsos began to show themselves, haughtily intertwined like dancers in a paso doble. 

This picture shows the end result…


….with  the hoped for fiddleback  also showing up.


One of the other great pleasures of working with Huon pine is its fragrance due to the release of the volatile oil, methyl eugenol. This obviously also delights the local fruit flies which, as shown below,  land  on the wood and won’t budge even when the chisel blade is within millimeters.

They seem stoned, or more probably smitten, as this oil is apparently a pheromone with potent aphrodisiac properties. This fools the male fruit flies into thinking that a particularly  alluring female is somewhere nearby. Rather unsportlngly , this weakness is exploited by citrus growers by mixing it with insecticide in fruit fly traps.


The other remarkable feature of Huon pine is how it grows and propagates. It’s now quite rare for three reasons – it is only found in one place – around the Huon river is south west Tasmania; it grows very slowly – only increasing the diameter of its trunk by about 1 mm  a year, and, the biggest survival risk of all – it is coveted by humans for boats, furniture and carving. Although it can reproduce by seeding, it more usually  spreads by vegetative or clonal processes. This is a property it shares with only a few other trees such as the bristle cone pine and the aspen found in the USA. Undisturbed, these genetically identical clumps of Huon pine stay around a long time – on average around 1000 years. One all-male stand of trees all with identical DNA was recently found at Mount Read  that  is reckoned to be over 10,000 years old.

Fortunately what remains, especially the naturally fallen timber, is now being carefully conserved and marketed in a way that accommodates demand, and inhibits illegal logging. A video shows this water born salvage program in action

All this raised an interesting thought. The starting piece was clearly only a small part of the original trunk – perhaps split off in a storm, or in a forest fire, or when felled by timber cutters.  From this I made a rough estimate that the original diameter of the tree was probably about 900 mm. So this paso doble duo may have been waiting to strut onto the dance floor for the better part of a millenium .

I usually inscribe my name, the type of the wood, and the year that the piece was produced on the  underside of the base. Perhaps for Huon pine from now on  there should be two numbers : “Year of discovery” and “Estimated time in hiding.”


Turkeyism

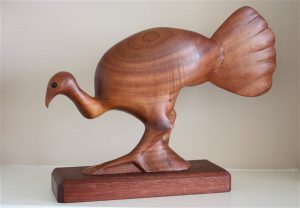
I said on the ‘About’ page that all the works in the Gallery had been sold, but this was a slight exaggeration – if only by one. Sadly, no one seemed to want the Bush Turkey.

I must admit that I was a bit  disappointed as I thought she was one of my better pieces. This was probably just the usual hubris of the creator being confronted by the nemesis of public opinion, but there did seem to be another factor at work – local antipathy towards bush turkeys. Several visitors to the gallery remarked that they quite liked it as a carving, but didn’t want a reminder inside their homes of a creature that caused such havoc outside.

I had to concede that they had a point, as we had ‘fallen fowl’ of the mating habits of a pair in our garden a year or so ago. We should have known better, – spreading a large load of pine bark mulch in the early spring to keep moisture in the ground through the hot summer. This is just the time when female turkeys, as with the females of several other species judge the quality of potential mates, not only by their plumage, but by their worldly goods and construction skills. The males enthusiastically demonstrate their prowess by using their powerful claws to build egg incubating mounds a metre or so high and several metres across. Mulch is ideal building material, as bacterial fermentation generates the heat necessary for egg incubation. Broody females are not easily impressed however, and repeatedly check that the temperature is just right by digging small holes in the mound and inserting their heads as thermometers. Re-spreading the mulch is useless – turkeys can restore their mounds overnight and will do so repeatedly. As this video shows they will fiercely defend their mounds against marauding monitor lizards and  carpet snakes , so the average suburban gardener doesn’t stand a chance.

What makes this spirited defence even more remarkable is that it involves a sort of ”sequential ménage a trois’ as the eggs that the female deposits in her newly constructed mound were fertilised by another male on some earlier romantic evening,  The line of her latest paramour will be continued, but in the mound of her next conquest. This may perhaps explain why, as shown on the above video, the emerging chicks are not treated much better by the cuckolded male than are poacher lizards.

So we called for the Turkey Relocation Man who uses a trap for the males baited, not with food, but with just a mirror at the far end. The males, in common with some of those of other species, are  rather vain and aggressive, and not very bright, and will attack the apparent rival by vigorously pecking at their own reflections in the mirror long after the trap door has snapped shut behind them.

There was however a happy ending in the case. Our daughter, who lives in Wyoming USA, where winter temperatures can drop to -20 C even before wind chill adds its bite, was happy to provide a refuge the turkey as a welcome reminder of her warmer childhood days in Brisbane. We made sure that the refugee didn’t arrive until after Thanksgiving.


Finding the form – Lilly Pilly

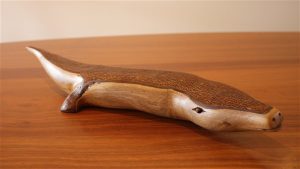
Another lucky accident. There are lots of different sorts of lilly pilly ranging from small flowering shrubs to large fast growing trees. Some of these are good to carve. We had to get the tree loppers to trim some large ones at the bottom of our garden as their shade was making it difficult to grow anything else down there. One of the logs had bark that looked a bit reptilian, a sinuous curve,  and a couple of branches that would do as the legs ended up as a crocodile, – maybe one that had been in a fight to account for the low leg count. A couple of v-groves with small glass beads gave him a beady pair of eyes.

I carved this one from green wood which was easy –  some lilly pillies, including this one dry out to be very hard and unnpleasant to carve. I learned an important lesson however that is  well-known to experienced carvers and turners – greenwood shrinks and usually cracks as it dries. The way around this is to either do a rough over-size first cut and then let it dry and shrink before the final shaping,  and/or keep the piece covered in plastic between carving sessions. Fortunately the cracks on this piece were not too catastrophic

Finding the form – Rosewood

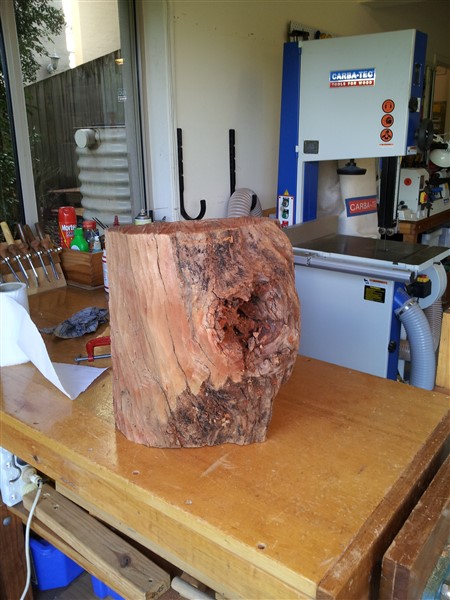
Sometimes a deformed or damaged piece of wood can turn out to have interesting possibilities ……


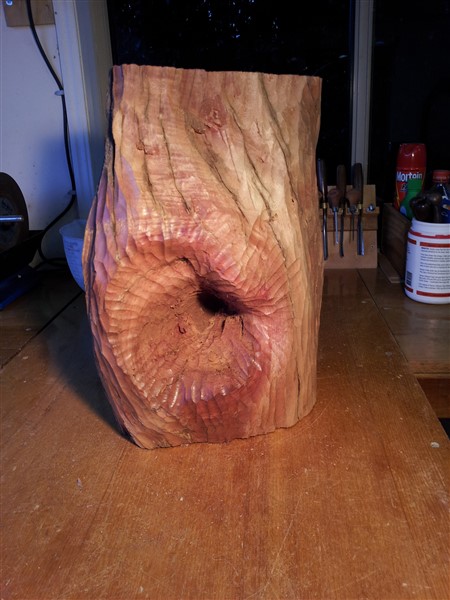
This was a half section of a rosewood log that I thought would end up as scrap, because of the large knot hole, but cutting off some of the bark showed that most of the underlying wood wasn’t too bad. As rosewood isn’t that easy to find it seemed worthwhile to see what else lay below…

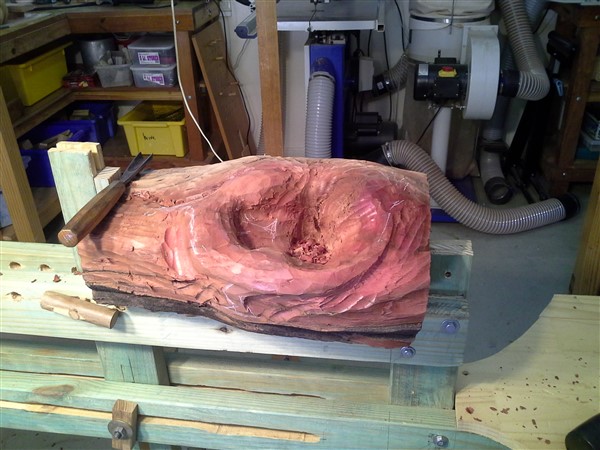
When the rest of the bark was removed, most of the wood around the knot hole was also pretty good and largely free of damage from the usual villains – borers and fungus, and a shape slowly appeared that reminded me of a the curve of a lizard on a log or tree branch…


As the shape of the lizard began to appear, my luck seemed to hold, as the key parts were also in good condition. I seemed as though a reasonably realistic lizard could be fashioned if I  could manage to cut  the legs going down onto the walls of the cave of the knot hole…It then became clear that having the lizard sitting on a tree trunk would be a bit tricky so I reshaped the base as a rock. There was one crack across the neck  that I couldn’t carve out without going too deep, so I decided to turn a fault into a feature.


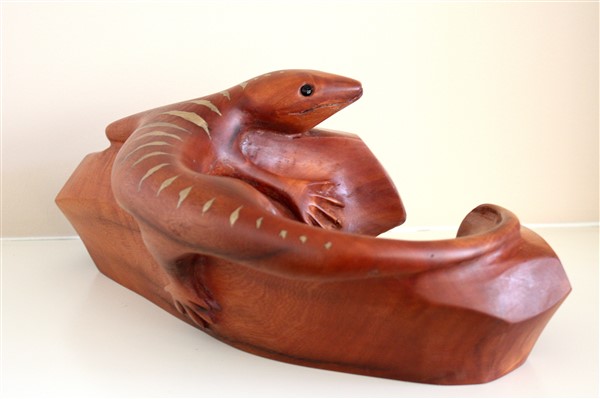
So  I made it into a more regular diamond shape and  carved a few more as markings down the body and tail then and filled them with bronze inlays. 

The final result – the Rock Lizard.


This  inlay technique has since often proved useful – not only for dealing with unwelcome cracks and other blemishes, but as a decoration in its own right in perfectly good, but otherwise not very interesting wood. Sometimes the grain is quite beautiful enough on its own without any ‘lilly-guilding’, but a plain surface may suddenly  come alive with the help of a little cosmetic surgery. As with ageing celebrities, it’s important not to overdo it.

A few questions

Common questions about my work include : how long did it take you ?  where do you get your ideas from ? -where do you get your wood ?  how do you get such a smooth finish ? or how do you do the metal inlays ?

The first is the easiest to answer, and varies from a few days to a few weeks, though I like the response of a favourite oil painting teacher of Lucy’s who replied ” a week and forty years” – as she had spent most of her life learning her art. So in my case I suppose it would be “a week and three or four years” as this is how long I’ve seriously been trying to learn how to carve, but I’ve worked in in wood for various utilitarian projects for most of my adult life – from pergolas and worksheds, to coffee tables and cupboards – they all gave me a good start in learning how to cut and shape wood.

The second is a bit harder – sometimes a pleasing natural twist or flaw in the wood will suggest something – a crocodile or a lizard to give a couple of specific examples  that will be covered in later posts, but more often the shapes arise from a hybrid mixture of many ideas –  often inspired by other carvers and sculptors whose work I admire. Sometimes this is conscious and then there is a fine line between creative adaptation and plagiary, but more often it is unconscious – a form of evolution as ideas flit from brain to brain, brain to hand, and hand back to brain, usually mutating a little at each flight, and only surviving if they are the fittest for the moment and the material.

The third I have tried to answer on the Resources page, at least for  Brisbane, Australia where I live. It’s an important question – the explosion of possibilities  when I left behind the challenges of tough eucalypt firewood logs and boring bits of hardware store pine , and discovered the pleasures of working in white beech or rosewood or cedar was a deilght.

The questions about  finishing and inlays and other techniques and tricks that I’ve learned along the way I’ll try to answer in future notes.